How To Install Carpet Without Knee Kicker
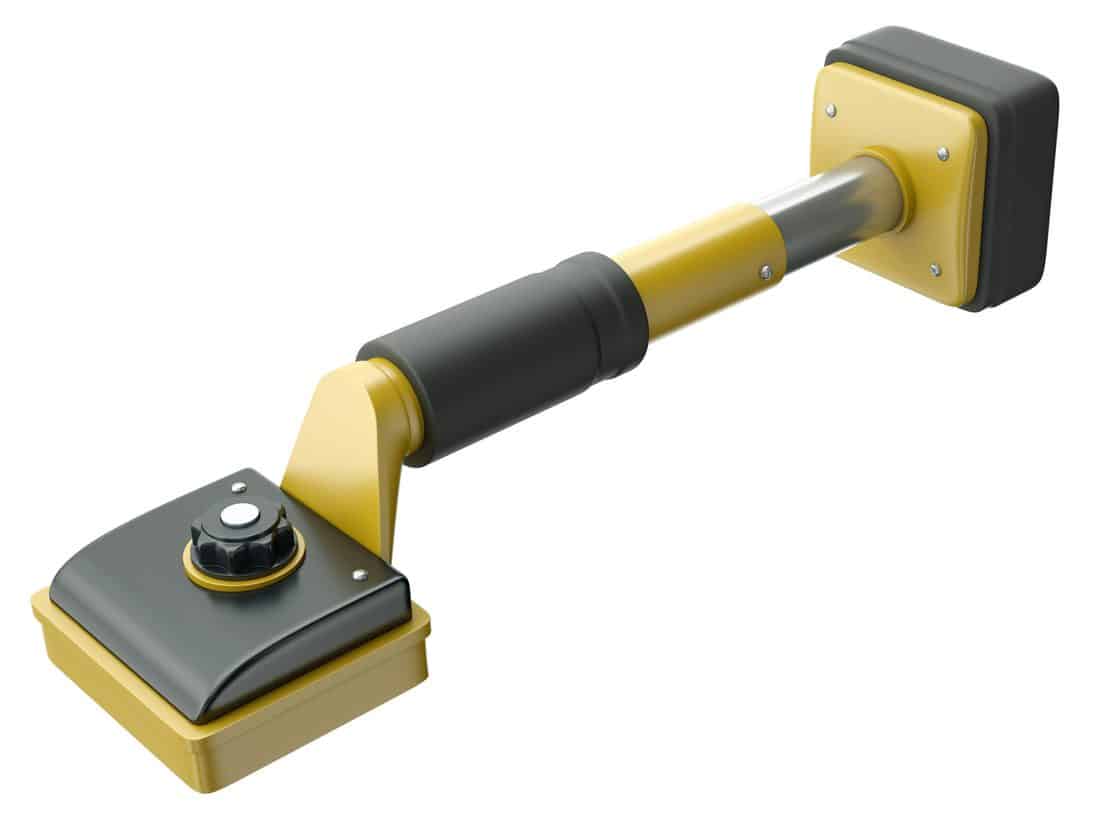
When reading about ways to install a carpet in your home, you may come across the word "knee kicker" fairly often. A knee kicker is a tool used to help stretch the carpet during its installation. But do you really need this tool to install a carpet? In this post, we will answer this for you.
While it's generally not recommended that you take on the task of installing a carpet without a knee kicker, you do have a couple of options if you do not want to purchase one. One, you can simply install the carpet without a knee kicker. Or two, you can create your own makeshift knee kicker. To lay carpet without a knee knicker, follow these steps:
- Install tack strips
- Cut and lay carpet padding
- Cut and lay carpeting
- Stretch carpet using "jump" method
- Connect carpet to tack strips
In this post, we'll go over the steps you'll take to install carpet without a knee knicker and how to create a makeshift knee kicker. Both are valuable and you'll want to know how to achieve each one. We'll also discuss whether or not carpet padding is necessary, how to tell if your carpet has been installed properly, and more. So be sure to keep reading!

Steps to Installing Carpet Without A Knee Kicker

It's important to know that laying a carpet without a knee kicker can cause issues with buckling as well as carpet creases. This means that it may not lay as flat as it would if you had used a carpet stretcher tool (aka knee kicker). However, if you're going to do this, it's best to have on non-slip shoes (with a rubber bottom) when doing so.
Tools you'll need:
- Tack strips
- Utility knife
- Workman's gloves
- Staple gun
- Carpeting
- Carpet padding
Step 1: Install Tack Strips
After checking your subfloor and making sure that it's ready for carpet installation, install your tack strips around the perimeter of the room. Normally, you would install these tack strips about 1/2 inch between the tack strip in the wall. However, since you will not be stretching the carpet to meet the tack strips, you can place them directly against the wall.

Check out these tack strips on Amazon.
Step 2: Cut And Lay Carpet Padding
Measure your carpet pad so that it is the exact dimensions of the perimeter of the floor. Use your utility knife to cut the carpet pad so that it's the exact square footage of the room's floor minus the width of the tack strips.
Next, starting in the corner of the room closest to the left side of the door, begin laying the carpet padding on the floor. Keep in mind that the padding should not be placed over the tack strips, but instead up against them (as not to cover them). Be sure to staple (or glue) down every edge of the carpet padding to ensure security.

Check out this carpet padding on Amazon.
Step 3: Cut And Lay Carpeting
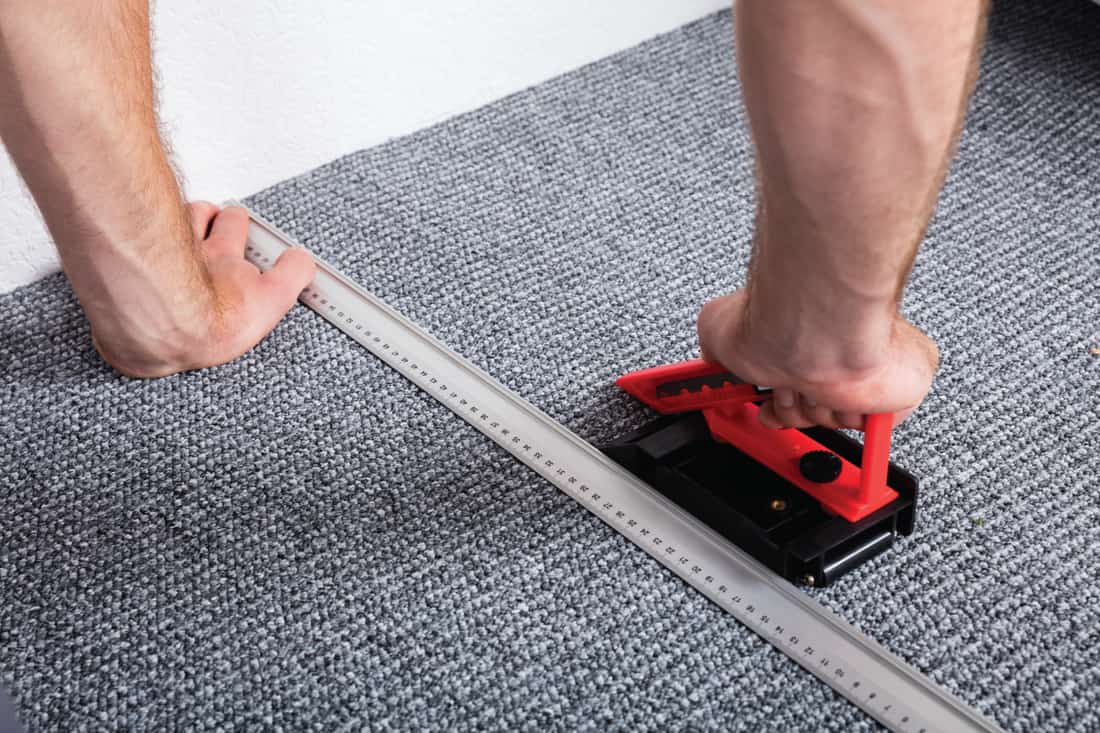
Using your carpet cutting tool, cut your carpet so that it is the exact square footage of the floor's perimeter (note: this step only applies if you didn't order the carpet pre-cut). Next, starting at the corner of the room that's the furthest from the door, began laying the carpet and unrolling it as you work your way toward the door.
Step 4: Stretch Carpet Using "Jump" Method
After you lay each piece of carpet, go back to the edge where the tack strip is, and while facing the wall (and tack strips), jump forward about one foot, making sure to use the momentum of your jump to stretch the carpet so that it meets the tack strip. If the carpet doesn't reach the tack strip on the first jump, repeat this step once or twice.
Step 5: Connect Carpet To Tack Strips
Next, with workman's gloves on, place the edge of the carpet over the tack strips. Hook the edges of the carpet securely over the tack strips and continue along the perimeter of the room until all of the edges have been placed over the strips.
If needed, walk around the room again to inspect the carpet at the edges to make sure that it is trimmed enough so that it is not raising above the strip and touching the wall. If it is, simply trim it down using your carpet cutting knife. And then you're all set!

Click here to see these gloves on Amazon.
Now, let's go over how to make this device at home.
Steps To Make A Makeshift Knee Kicker

If you're familiar with performing woodworking projects and don't want to buy a knee kicker, you can actually make the device yourself using a few materials, many of which you may already have in your home.
Tools you'll need:
- One 4×4 plywood plank
- Sandpaper (80-grit, 100-grit)
- Tack strip cutter
- One 5×5 inch piece of foam
- Electric saw
- One 8×8 inch piece of leather or upholstery fabric
- 1 tack strip cut to 12 inches
- Wood glue
Now on to making the kicker.
Step 1: Cut The 4×4
Take your saw and cut the wood 4×4 so that it is 16 inches long. Next, use your sandpaper to sand down the surface of the wood if it's not completely smooth. This will help you avoid getting splinters while you're using the tool.

Check out this sandpaper set on Amazon.
Step 2: Cut The Tack Strip
Using your tack strip cutter, cut the tack strip into 4-inch strips. Make sure that you have enough strips to cover the front of the kicker, which should be about 5 or 6 pieces. If you don't have tack strip cutters, you can also your saw to cut it. Be sure that you wear your handyman's gloves when handling the tack strip, as it can easily cause injury to your fingers.
Step 3: Attach The Strip To The Plank
Take your wood glue and apply it on one end of the 4×4 (not the bottom, but the face of one side). The glue should cover about 25 square inches of the face of the post. Next, take your cut patch pieces and place them (back first) on the face of the post. The teeth of the strips should be facing you. After you've applied the strips, give the glue a few minutes to dry.

Check out this gorilla wood glue on Amazon.
Step 4: Attach The Kicker Piece
Once the glue on the tack strips has dried, apply glue on the bottom of the 4×4. This will be your kicker piece. Next, take a piece of foam (or other thick padding material) and place it on top of the glue. Then place a piece of leather or upholstery fabric on top of the foam, making sure to secure the edges completely around the foam. You don't want this to fall off while it's in use.
Also, make sure that the piece of leather or fabric not only covers the foam padding but that its edges touch the wood post as well. Allow the glue to dry.
Step 5: Test The Kicker
It's best to first test out the kicker to make sure that all of the pieces are securely glued in place, as this will help you avoid injury when using it. Perform a few knee kicks on the end to assure that the amount of padding is sufficient and that the leather or upholstery remains in place. Also, test the security of the tack strips by placing it on a carpet and tugging at it a bit.
Can You Lay Carpet Without Padding?
Yes, it is possible to lay carpets without carpet padding. However, flooring professionals typically advise against this. Carpet padding is used to protect your carpeting from wear and tear against its subfloor. Padding also works to keep the underside of the carpeting from sliding across the floor, minimizing the impact of frequent foot traffic and heavy furniture. Here are a few additional benefits of carpet padding:
Provides Soft Cushioning
Carpet padding makes walking across a carpet more comfortable, as it provides a layer of cushion against the subfloor. This is why it's also important that you choose the right carpet padding for your floor, which may vary depending on the type and style of carpet that you have.
Minimizes Dirt
Padding also allows you to clean your carpet more efficiently. When a carpet that has padding beneath is vacuumed, the vacuum will slightly raise the carpet, allowing for the removal of more dirt. This can help to reduce allergic reactions two things such as dust mites and pollen.
Provides Insulation
It also works as an efficient insulation material. Most carpet padding is made from recyclable materials such as paper and other fibrous materials. When installed beneath the carpet, the padding can help prevent drafts from seeping through the carpeting or from beneath doors. It's also important to know that the higher the R-value for the padding, the more effective its insulation abilities will be.
Dampens Sounds
The thick material that carpet padding is typically made of can also work as an effective sound dampening material. This can be especially useful for rooms located on top floors.
Can You Stretch Your Carpet Yourself?
Yes, you can definitely stretch your carpet yourself using a carpet stretcher to do so. Carpet stretchers usually weigh around 5 pounds (though some can weigh up to 8 pounds). The biggest challenge with stretching your carpet yourself centers around knowing how to use a carpet stretcher properly and being able to endure the physically demanding process of using it.
If you are performing this task alone, it may take you about double the time that it would a professional carpet installation expert–but again, many homeowners do choose to perform this task themselves to save on installation costs.
Carpet stretching involves getting on your hands and knees and moving throughout the perimeter of the room to physically nudge the end of the kicker with your knee so that it pushes the carpet toward the tack strips. If you've never done this before, you may find yourself getting exhausted fairly quickly. So with that being said, be prepared to get your knees dirty…literally.
How Do You Know If Carpet Is Installed Properly?
If you are unsure whether or not a carpet installer has laid your carpet properly, there are a few checks that you can perform to analyze the work. Here is a couple of them:
Check For Folds Or Wrinkles
Take a glance at the surface of your carpet. Look for any folds or wrinkles that may cause the carpet to appear rippled or distorted. If the carpet installer has not effectively pulled the carpeting over the tack strips, you will probably see creases along the carpet's edges.
If you do see a wrinkle, press your foot likely on the wrinkle to see if it goes away. If the wrinkle vanishes, the carpet should be fine. However, if the wrinkle remains, this means that the installer did not stretch the carpet properly.
Check For Carpet Leveling
Lay down on the floor and look at the carpet from the side. Check to see if there are any divots, buckles, or dips on the surface of the carpet. If you notice any areas where the carpet has creased or buckled, then you may need to call your installer back to have them take a look at the carpet and fix the issue. Also, note that the issue could be with the subfloor beneath and not exactly the carpet itself.
Wrapping Things Up
Hopefully, we provided you with enough information on how to lay a carpet without using a knee kicker, as well as how to make your own device at home. It's not uncommon for homeowners to install their own carpeting, but it is important to understand that this can be a very physically demanding project.
Interested in learning more about carpeting? Be sure to check out our other posts before you go:
Can Bedrooms Have Different Flooring?
Should Stairs Match The Flooring That's Upstairs Or Downstairs?
How To Install Carpet Without Knee Kicker
Source: https://homedecorbliss.com/how-to-lay-carpet-without-knee-kicker/
Posted by: iglesiascocam1971.blogspot.com

0 Response to "How To Install Carpet Without Knee Kicker"
Post a Comment